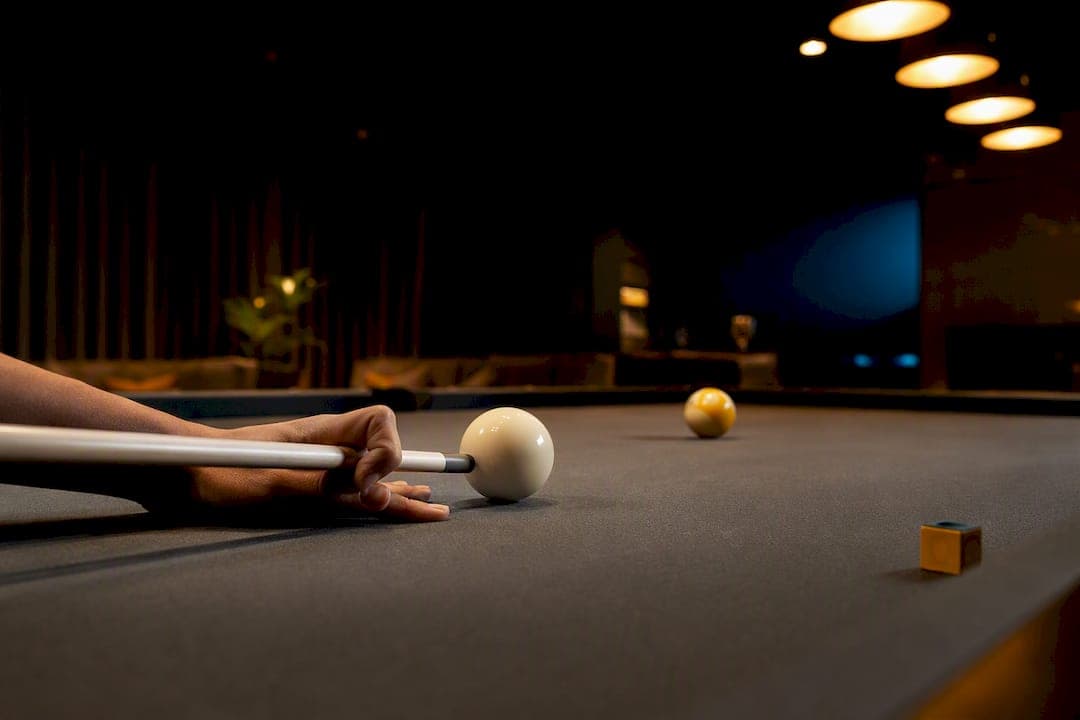
Cue ball control means picking the contact point and pace so the cue ball finishes exactly where your next shot needs it. Start with the stop shot at close range, then layer in tangent-line aiming before you touch spin. Track your progress by a simple metric: can you park the cue ball within a diamond or two of a chosen target, twice in a row, before moving on?
TL;DR:
- Consistently master stun shots at close range before extending to longer distances, adjusting pace to account for friction and distance effects.
- Use tangent lines and fractional aiming to plan cue ball paths, adjusting for real-world factors like squirt and throw to improve shot accuracy.
- Separate pace (shot strength) from spin (tip contact point) and keep the cue level during draw and follow shots to ensure reliable spin control.
- Focus on achieving two consecutive successful shots at each drill to build precise, repeatable cue ball control rather than just practicing many repetitions.
- Maintain proper cue tip size, shape, and chalk condition, along with consistent equipment, to improve shot repeatability and minimize alignment errors.
Table of Contents
- What Are the Core Cue Ball States? Stun, Follow, and Draw
- How Do Tangent Lines and Fractional Aiming Work?
- Why Pace and Spin Aren't the Same Thing
- A Step-by-Step Drill Progression for Cue Ball Control
- Fixing the Most Common Cue Ball Control Mistakes
- How Club Practice Sharpens Cue Ball Control
- Does Cue Tip Size and Cue Maintenance Affect Cue Ball Control?
- Using Cue Ball Control in Combinations and Safety Play
- The Overrated Advice and What Actually Moves the Needle
- Practice What You've Learned at Q Billiards Arena
- Sources
What Are the Core Cue Ball States? Stun, Follow, and Draw
Every position shot boils down to three cue ball states, and confusing them is the number one reason amateurs overshoot or undershoot their target.
Stun (stop) happens when the cue ball hits the object ball while still sliding, with no forward or backward rotation. Hit the center of the cue ball with a firm, punchy stroke and it stops dead (or close to it) on contact with a full ball hit. Follow (topspin) comes from striking above center; the cue ball keeps rolling forward through the object ball's line after contact. Draw (backspin) comes from striking below center with a smooth, level stroke; the cue ball skids to a stop, then reverses back toward you.
Tip placement roughly maps to outcome: center ball for stun, upper third for follow, lower third for draw. But distance matters as much as tip position. Friction converts a sliding cue ball into a rolling one over distance, so a stop shot that works perfectly at two feet will drift forward at eight feet unless you add pace or a touch of draw to cancel the roll.
Build the progression in this order:
- Master stun shots at close range before adding any distance.
- Extend stun shots to longer distances, adjusting pace so backspin decays to zero right at contact.
- Introduce follow and draw only after stun feels automatic at varied distances.
- Combine spin with angle changes last, once straight-in shots are consistent.
Pro Tip: Test your draw at point-blank range first. If it works up close but dies at distance, you have a pace problem, not a technique problem.
How Do Tangent Lines and Fractional Aiming Work?
The tangent line is the path a sliding cue ball takes after contact: it runs at 90 degrees to the object ball's direction of travel on any shot struck with pure stun. That single rule gives you a planning tool before you ever add spin. Pick your cut angle first, trace where the tangent line sends the cue ball, then decide whether follow or draw needs to bend that path toward your actual target.
Fractional aiming, drawn from the classic quarter, half, and three-quarter ball templates, gives you a quick visual shortcut for choosing that cut angle without doing geometry mid-shot. Here's how to use it on the table:
- Look at the overlap between cue ball and object ball needed to send the object ball where you want it.
- Use the half-ball hit as your default reference; it corresponds to roughly a 30-degree cut and covers a huge share of practical shots.
- Adjust to a quarter-ball or three-quarter-ball hit for tighter or wider angles as the shot demands.
- Trace the resulting tangent line 90 degrees off the object ball's path to see where stun alone would leave the cue ball.
- Decide how much follow or draw you need to move off that tangent line toward your real target.
These rules are reliable starting points, not guarantees. Throw, squirt, and longer distances all bend the actual path away from the textbook line, which means fractional aiming gets you close and your practice reps close the rest of the gap.
Why Pace and Spin Aren't the Same Thing
A lot of amateurs think hitting the ball harder automatically means more spin. It doesn't. Pace (how hard you hit) and spin (where you hit) are separate variables you control independently, and mixing them up is where a huge share of missed position plays come from.
The most common technique flaw is raising the cue butt to "help" the draw. That elevated angle causes the cue ball to hop off the felt instead of gripping and spinning cleanly. Keeping the cue level on draw and follow shots produces far more consistent spin than any amount of extra force.
Quick diagnostics to run at the table:
- If draw dies at distance but works up close, it's a pace issue, not a spin issue.
- If the cue ball hops visibly off the cloth, check your cue elevation before anything else.
- If contact feels inconsistent shot to shot, check chalk and tip contact point before blaming your stroke.
One instructional finding worth internalizing: the most reliable way to build draw is practicing maximum-action draw at close range, then scaling pace back for longer shots, rather than tilting the cue to force more action.
A Step-by-Step Drill Progression for Cue Ball Control
Building reliable position play is a stacking exercise. Each drill below assumes you've mastered the one before it.
- Stop-shot ladder. Set the object ball at 1, 3, and 6 feet from the cue ball, straight in. Hit center ball with enough pace that the cue ball stops within six inches of contact. Advance a distance only after two consecutive successes.
- Wagon-wheel / diamond drill. Place the object ball near a corner pocket and practice sending the cue ball one diamond, then two, then three diamonds up the table using follow or draw. This diamond-based progression is a staple of structured cue ball training because it turns vague "feel" into a measurable target.
- Tangent tracking. Cut a ball at 30, 45, and 60 degrees using stun only, and mark where the cue ball actually stops relative to where the tangent line predicted. This calibrates your read of the 90-degree rule against real table conditions.
- Three-position black. From one object ball, practice sending the cue ball to three different marked zones on separate attempts, alternating stun, follow, and draw.
- Nominated-distance practice. Call a specific diamond or spot before each shot, then check how close you land. This is the single best way to convert drilling into position play you can trust in a real rack.
Use the two-consecutive-success rule throughout: you don't advance to a harder version of a drill until you've hit the current target twice in a row. It filters out lucky shots and forces you to internalize the exact tip offset and stroke length each position requires.
Mark your targets with coins, chalk cubes, or spare balls so there's an objective checkpoint instead of a vague sense of "close enough." A practice partner can spot for you and call out results, which speeds up feedback more than practicing alone.
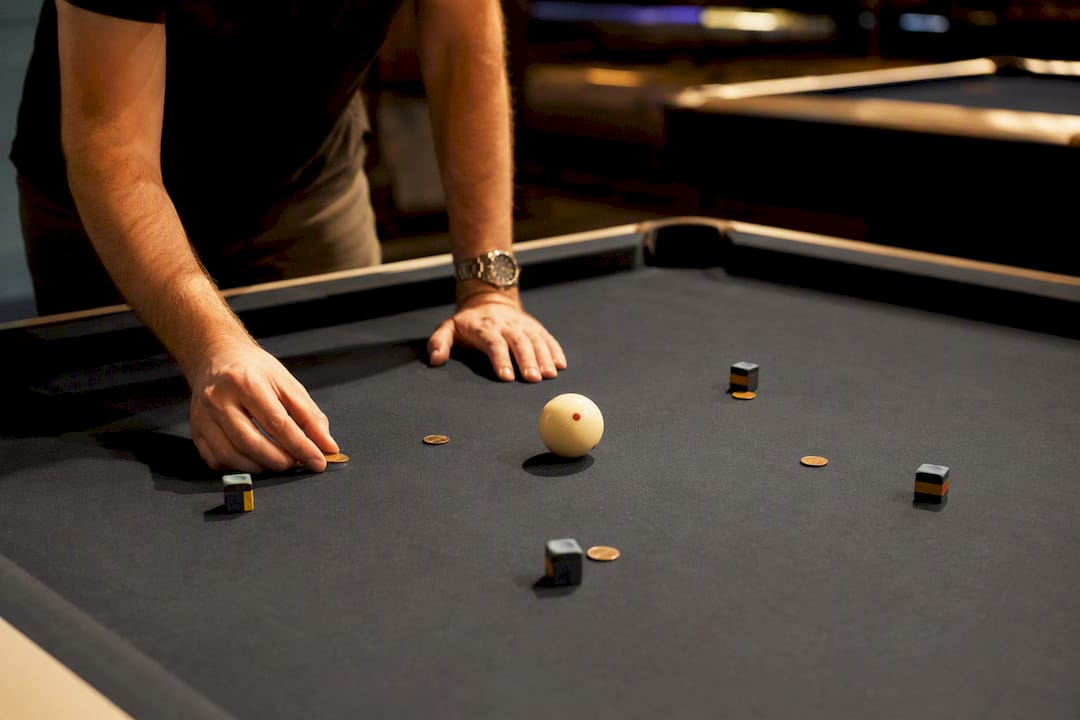
Pro Tip: Log your tip offset for each diamond of cue ball travel. Coaches call this a tips-above/below-center system, and writing it down turns guesswork into a repeatable reference you can recall under pressure.
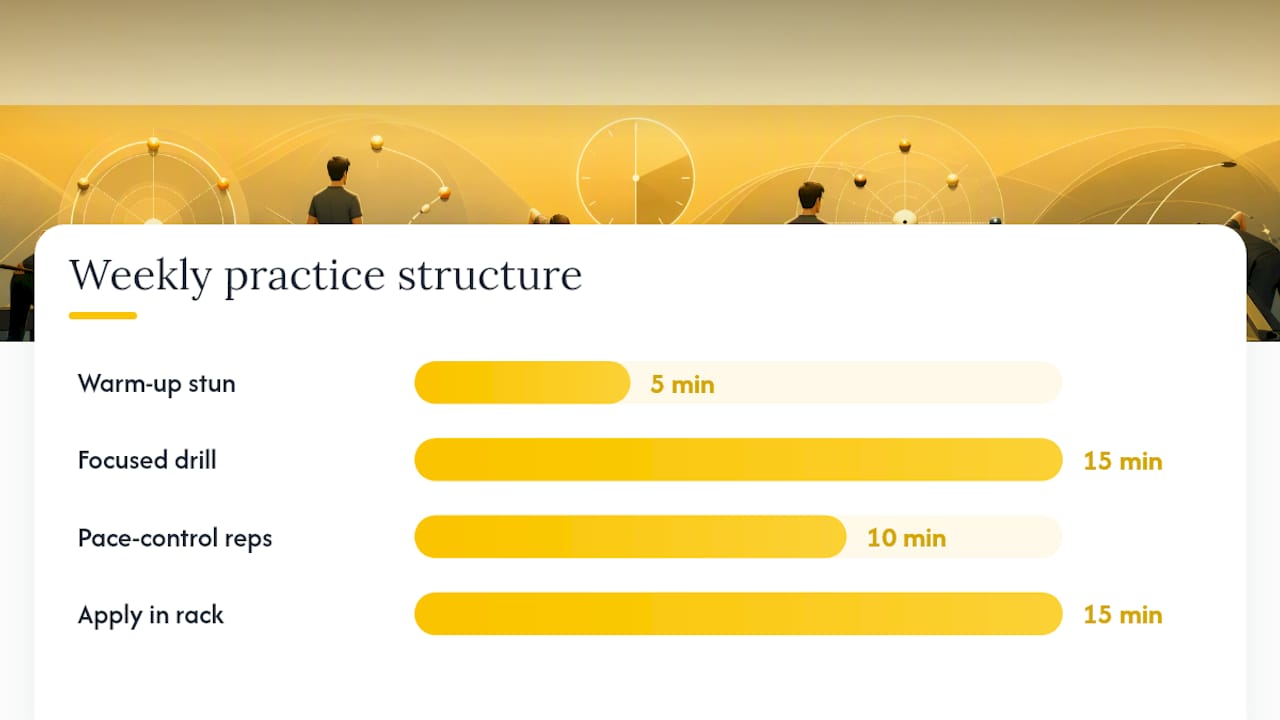
A simple weekly structure: five minutes of warm-up stun shots, 15 minutes on one focused drill (ladder, wagon-wheel, or tangent tracking), 10 minutes of pace-control-only reps, then 15 minutes applying it inside actual rack situations rather than isolated setups.
Fixing the Most Common Cue Ball Control Mistakes
Most control problems trace back to a small handful of repeatable errors, and most of them are fixable in a single session once you know what to check.
- Raising the cue butt for draw. This causes hop and inconsistent contact. Keep the cue as level as your bridge allows.
- Inconsistent tip contact point. If your stroke wanders off your intended tip zone, the resulting spin varies shot to shot even with identical pace.
- Misjudging pace instead of technique. Test any failing shot at half the distance first; if it suddenly works, the fix is pace, not stroke mechanics.
- Ignoring cut-induced throw (CIT). On thin, slow cuts, the object ball can drift off its expected line. Compensate by aiming slightly thinner or adding a touch of outside running English, especially on angles where a miss would ruin your position anyway.
Run this quick on-table checklist when something feels off: cue level, fresh chalk, a short-range draw test to isolate pace from technique, and a pause to check your stroke rhythm before the next attempt.
How Club Practice Sharpens Cue Ball Control
Consistent equipment removes variables that hide your actual skill level. Practicing on tables with the same cloth speed and rail response every session lets you build muscle memory that transfers, instead of relearning feel every time you switch tables.
Structured session formats accelerate this further. A typical format runs a coached demonstration of a shot, a partner-spotted repetition block where someone confirms whether you actually hit the target, a timed drill sequence to build pace under mild pressure, then a feedback round before moving to the next drill.
Cue ball control improves fastest when players stop treating pocketing and position as two separate skills and start naming a target for both the object ball and the cue ball on every single shot they practice.
That single habit, borrowed from structured coaching curricula, does more for a player's progress than any single drill on its own.
Does Cue Tip Size and Cue Maintenance Affect Cue Ball Control?
Tip size and condition change how forgiving your cue is on off-center hits, which directly affects how repeatable your spin becomes. A smaller tip (around 12 to 12.5mm) concentrates contact into a tighter zone, giving you more precise spin placement but less margin for error if your stroke drifts slightly off-center. A larger tip (13mm and up) is more forgiving on mis-hits but can make extreme spin slightly harder to generate cleanly.
Tip shape matters just as much as size. A tip that's gone flat or mushroomed from wear spreads contact across a wider surface, which makes it harder to hit precise spots above or below center. A properly rounded tip, maintained with a nickel or dime-radius shaper, gives you a consistent, predictable contact point shot after shot.
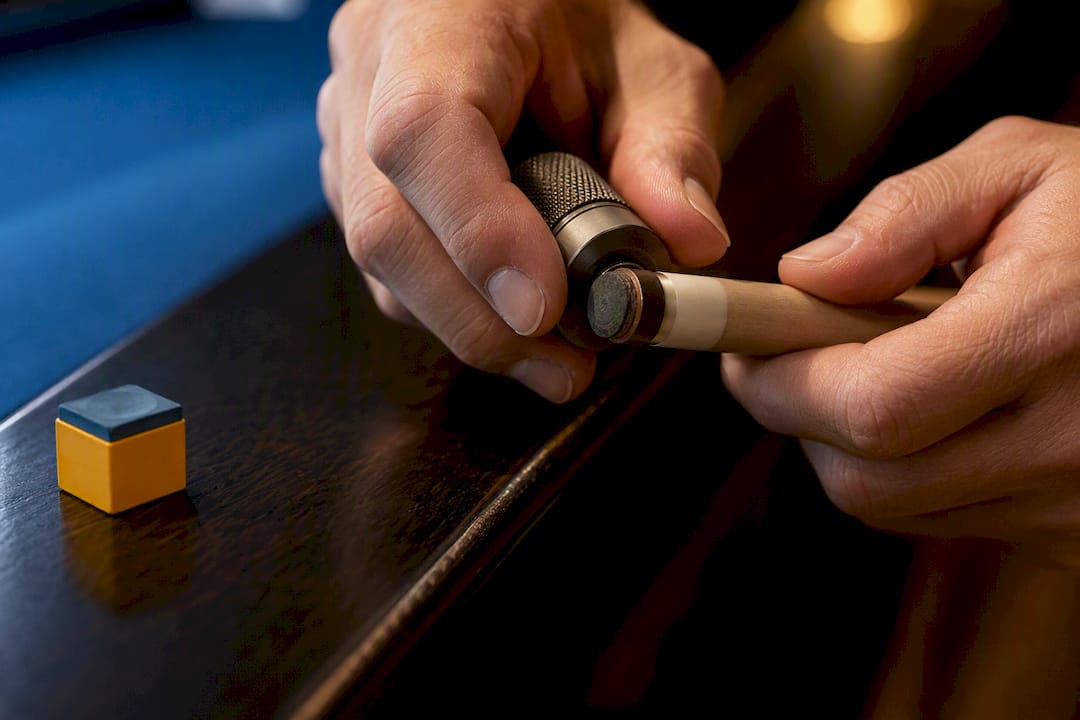
Chalk condition matters too. A tip that isn't chalked properly, or chalked with old, caked chalk, is far more prone to miscuing on shots that need heavy follow or draw, exactly the shots where a miscue costs you the most position. Get in the habit of chalking before every shot, not just when you remember, and check your tip's shape every few sessions rather than waiting until it visibly fails you.
Shaft straightness and ferrule condition round out the maintenance picture. A warped shaft introduces small aiming errors that compound over a long shot, undermining even a perfect tangent-line read. None of this requires expensive gear, just a regular check of the parts of your cue that actually touch the cue ball.
Using Cue Ball Control in Combinations and Safety Play
Position play stops being an isolated drill exercise the moment you're planning two or three shots ahead in an actual rack, and that's where cue ball control earns its keep.
On combination shots, the cue ball's job doesn't end at contact with the first object ball. You need to send it to a spot that sets up your following shot too, which means reading the tangent line off the first contact and deciding in advance whether stun, follow, or draw gets you there. Treating the combo as a single connected plan, rather than "pot this, then figure out the next shot," is what separates players who run racks from players who get stuck after one good shot.
Safety shots flip the priority: instead of optimizing position for your next shot, you're using cue ball control to leave your opponent with the worst possible angle or the least visible object ball. A soft stun shot that tucks the cue ball behind a blocker uses the exact same tangent-line reading skill as an offensive position shot, just aimed at denial instead of setup. Planning 8-ball run-outs backward from the key ball trains this same forward-thinking habit, since you're constantly deciding where the cue ball needs to land two or three shots before you get there.
Nine-ball rotation play rewards this even more, since the next legal ball is fixed by the rack order rather than your choice, so situational drills built around 9-ball patterns force you to solve position problems you can't simply avoid by picking an easier shot.
The Overrated Advice and What Actually Moves the Needle
Most cue ball control advice online jumps straight to spin, sidespin diagrams, squirt compensation charts, exotic masse shots, before a player can reliably stop a cue ball dead from six feet. That ordering is backwards. The tangent line and stun shot are the foundation everything else builds on, and skipping past them to chase impressive-looking spin shots is the single biggest reason intermediate players plateau.
The conventional wisdom also treats pocketing and position as separate skills you practice separately. That's a mistake. Every drill you run should name a target for the object ball and a target for the cue ball, every single time, because that's the actual skill you're building for real rack situations.
If you take one thing from this article, prioritize the two-consecutive-success rule over reps for the sake of reps. Ten sloppy repetitions teach you less than two clean, verified successes at a distance you can actually control. Speed comes later. Precision, first, is what makes the speed usable.
— Q
Practice What You've Learned at Q Billiards Arena
Reading about tangent lines only gets you so far. You need a table with consistent cloth speed and predictable rail response to actually calibrate your stroke, and that's exactly what Qbilliardshtx offers across its pro-grade tables in Houston.

Q Billiards Arena runs 25 tables built for exactly this kind of repetition work, whether you're grinding through a stop-shot ladder solo or running wagon-wheel drills with a partner spotting your results. Late hours mean you're not racing a closing time to finish a drill block, and the current promotion of free pool with an equal purchase makes extended practice sessions easier to justify. Weekly league play and tournament nights give you somewhere to test these drills under real pressure once they start clicking in practice. Check current games and pricing and book a table for your next drill session.
Sources
- Cue ball control: stop, follow and draw explained — CueCards
- Cue Ball Control — Dr. Dave Pool Info
- Cue Ball Control: The Revised Wagon Wheel — Billiards at Colorado State
- Fractional aiming system — Pool Coach TV