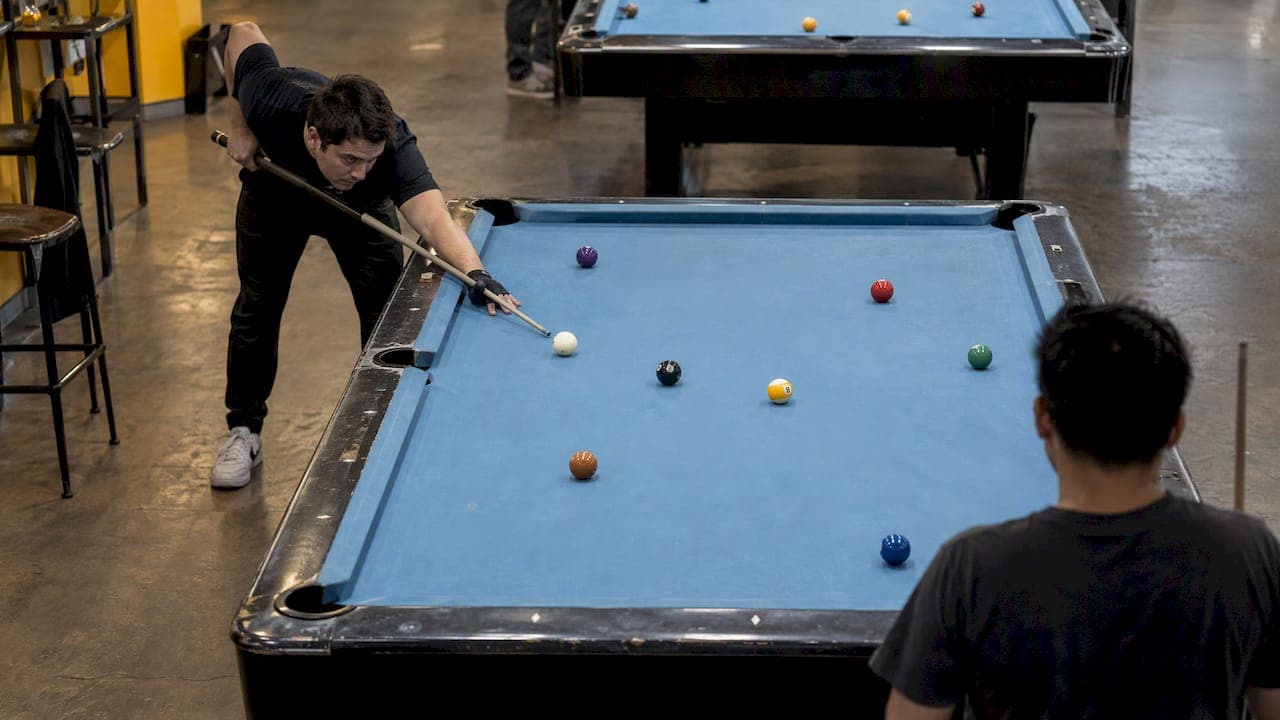
Play safety first when a run-out is low-percentage. Pros rely on a clear hierarchy: distance beats angle, and angle beats snooker. The rule of thumb is simple: if your realistic shot-making chance is lower than your safety success rate, you play the safety. How you call it, whether a push-out applies, and how balls get spotted all shape that decision in the closing stages of a rack.
TL;DR:
- Distance safeties are the safest option because they tolerate small errors and force opponents into difficult shots, especially when balls are far apart.
- Angle safeties require precise speed control and are more punishing if missed, but they can be more effective in forcing missed shots or difficult strips.
- Snooker safeties demand the highest accuracy and are best used when distance and angle options are unavailable, often late in a rack.
- Practicing each safety recipe at multiple speeds enhances consistency and prepares you for different table layouts and game situations.
- A well-placed safety can shift the momentum by forcing mistakes or hesitation, influencing your opponent’s rhythm and the overall rack outcome.
Table of Contents
- Why the safety hierarchy puts distance first, then angle, then snooker
- Safety shot recipes: stop-and-hide, roll-up, bank-hide, and freeze-on-rail
- How calling safeties, push-outs, and spotting rules shape your choices
- Build a decision routine and drill it until it's automatic
- Mistakes that turn a safety into a free shot for your opponent
- How we practice safeties at our arena
- How safety play shifts momentum and shapes your opponent's next move
- When to play it safe and when to press
- Book a table or coaching session to put these safeties into practice
- FAQ
- Sources
Why the safety hierarchy puts distance first, then angle, then snooker
A safety hierarchy exists because not every defensive shot carries the same risk. Distance safeties, where you simply send the object ball and cue ball to opposite ends of the table, give you the widest margin for error. A long table forces your opponent into a longer cut or a harder speed judgment, and even a slightly imperfect execution on your part still leaves a tough shot behind. The safety hierarchy of distance, angle, and snooker is taught specifically because each tier trades execution difficulty for payoff.
Angle safeties rank second. Freezing the object ball to a rail, or close to it, takes away a straight-in shot and forces a thin cut or a shot down a rail where any error sends the cue ball off the table. This is harder to pull off cleanly than a distance safety because you need precise speed and a correct read of where the object ball will land, but it punishes your opponent more severely when it works.
Snooker or hide safeties sit at the bottom of the hierarchy because they demand the most precision. You are blocking your opponent's direct line to the object ball using other balls on the table, which means tighter tolerances and a higher chance of leaving something hittable if you misjudge speed or angle. Even so, a snooker is sometimes the correct play, particularly late in a rack when a distance or angle safety is not available because of how the balls are clustered.
- Distance safeties tolerate small errors and still leave a hard shot.
- Angle safeties punish harder but need tighter speed control.
- Snooker safeties offer the biggest reward but the smallest room for mistakes.
Pro Tip: Before you commit to a snooker, ask whether a simpler distance safety achieves nearly the same result with far less risk.
Safety shot recipes: stop-and-hide, roll-up, bank-hide, and freeze-on-rail
Each safety type has a repeatable recipe. Learn the aim point, stroke length, and target finish for the cue ball and object ball, and these shots stop feeling like guesswork.
- Stop-and-hide: hit the cue ball center or slightly below center with a firm, short stroke so it stops dead on contact. Aim to pocket-starve the object ball toward a rail or behind a cluster, leaving your opponent a long, awkward angle. This works best when the object ball sits a foot or more from any rail and you have a straight or near-straight shot at it.
- Roll-up or snuggle: use a soft, natural roll with a slightly elevated bridge and a short, controlled stroke. The goal is to leave the cue ball resting close to or frozen against the object ball, killing any kicking or banking option. Speed control matters more than aim here, so rehearse the same stroke length until the roll distance becomes predictable.
- Bank-hide: bank the object ball off a rail into a blocker ball or cluster, using medium pace so it does not rebound past your intended resting spot. This recipe works when the object ball is near the middle of the table with no direct safety route, and it requires practicing bank angles at three or four standard speeds rather than one.
- Freeze-on-rail: drive the object ball to the nearest rail with enough pace to kill its action against the cushion, leaving it frozen or clearly out of reach rather than a ball-width away. The hide-safety and bank-hide examples documented in instructional diagrams show why a frozen ball removes many more reply options than one sitting an inch off the cushion.
Common table layouts dictate which recipe fits. A ball near a corner pocket but blocked from a direct shot favors stop-and-hide. A ball in open table space with nothing nearby favors bank-hide into a cluster. When you miss the mark on any of these, the typical opponent reply is a kick shot or a thin cut attempt, so always picture the miss before you shoot, not just the make.
Pro Tip: Practice each recipe at three speeds, soft, medium, and firm, so you can match pace to distance without recalculating mid-shot.

How calling safeties, push-outs, and spotting rules shape your choices
Rules around calling shots and fouls directly affect which safety is worth playing. Under standard call-shot formats, a shooter may declare "safety" before taking the shot, and play then passes to the opponent once that shot finishes. The WPA rules explain that any object ball pocketed during a called safety is typically spotted rather than counted as a legal pocket, which changes how aggressively you can play into clusters without fear of accidentally clearing the layout for your opponent.
Push-outs add another layer. Immediately after a legal break, the shooter may push out without hitting any rail or ball requirement, and the opponent then chooses who shoots next. According to the VNEA 9-Ball rules, balls pocketed on a push out are generally spotted except the 9-ball itself, so a push-out is often the smarter move when the layout after the break leaves no clean shot at all.
Fouls carry real consequences for risky safety attempts. The BCA rules summary notes that a foul awards ball-in-hand to the opponent, and three consecutive fouls cost the entire rack in most tournament formats. That three-foul rule should weigh on any decision to gamble on a thin safety attempt when a safer distance option exists.
- Calling a safety signals intent and changes how pocketed balls are scored.
- A push-out lets you reset a poor post-break layout without penalty.
- Three consecutive fouls hand the rack to your opponent outright.
One documented figure worth remembering: under push-out rules, the opponent gets to choose who shoots next after a legal push out, a detail that often decides whether a push-out or a direct safety is the better call.
Our internal rules breakdown on breaks and push outs covers how these situations play out across common tournament formats, and our guide to cue ball fouls walks through exactly how ball-in-hand penalties get applied.
Build a decision routine and drill it until it's automatic
A reliable decision routine turns safety play from guesswork into habit. Run through the same four steps every time: can I run out from here, what safety route gives me the best margin if not, which shot recipe fits that route, and what speed gets me to the target margin rather than just close to it.
- Stop-shot reps: set up 10 straight-in shots and practice stopping the cue ball dead, tracking how many land within a six-inch target zone.
- Freeze-on-rail drill: place the object ball a foot from a rail and practice driving it frozen to the cushion, aiming for 8 out of 10 successful freezes before moving the ball farther away.
- Bank-hide sequence: set three object balls near the center of the table and practice banking one into a two-ball cluster at medium speed, repeating until the pattern feels automatic.
- Thin-cut down-the-rail drill: practice sending a thin cut down a long rail to simulate the shot you are forcing your opponent into, which teaches you what margin actually feels safe from the other side of the table.
Track your practice with simple metrics: distance left between the object ball and the nearest pocket, your percentage of successful finishes out of ten attempts, and how many strokes it takes you to settle into your final stance. Once you hit a consistent success rate on a drill, add a layer of difficulty, like shooting from a slight angle instead of straight on, or practicing the opponent's likely reply shot so you know what you are actually defending against.
Pro Tip: After every safety drill, shoot the most likely kick or bank reply from your opponent's position. Knowing how hard that reply is tells you if your safety actually worked.
Mistakes that turn a safety into a free shot for your opponent
The most common error is leaving the object ball a ball-width off the rail instead of frozen or clearly away from it. This "big-ball trap" gives your opponent an easy angle to clip the ball in almost any direction, and safety strategy guidance specifically flags this near-rail gap as one of the worst positions you can leave.
Another frequent mistake is obsessing over cue ball position while ignoring where the object ball actually lands. A perfect cue ball hide means nothing if the object ball sits in open space with a clear pocket nearby.
- Leaving the object ball a ball-width from the rail instead of frozen or far away.
- Focusing entirely on cue ball position and neglecting the object ball's resting spot.
- Banking into a thin pocket of space that opens an easy kick shot instead of a genuine block.
- Failing to anticipate your opponent's most likely reply, which lets a mediocre kick or bank turn the table back in their favor.
Planning two shots ahead, your safety and their most probable response, catches most of these errors before you ever strike the cue ball.
How we practice safeties at our arena
Warmup routines matter as much as match-day execution. We recommend starting every practice session with stop-shot reps and a freeze-on-rail sequence before moving into full-table drills, since both build the speed control that every safety recipe depends on.
- Fifteen minutes of stop-shot reps to recalibrate speed before any safety practice.
- A freeze-on-rail sequence repeated from three different table positions.
- A full-rack simulation where you deliberately leave a tough layout and practice safety responses from both sides.
In our weekly tournaments, racks are often decided by a single well-placed distance or angle safety rather than a spectacular shot. Our longer-form snooker safety drills translate directly into pool safety practice, since both disciplines reward the same speed discipline. Readers looking to sharpen these patterns under real match pressure can join a coaching session or drop into open table time to run the drills above.
How safety play shifts momentum and shapes your opponent's next move
A well-placed safety does more than avoid a mistake. It forces your opponent to take on a harder shot than they expected, and that shift in difficulty often changes how they play for the rest of the match. A player who was shooting confidently suddenly has to slow down, reassess, and attempt a kick or a thin cut they had not planned for, and that hesitation frequently leads to a rushed decision or a tentative stroke.
Momentum in 9 ball often swings on exactly these moments. One clean safety that leaves no reasonable reply can pull an opponent out of rhythm for several racks, especially if they respond with a weak safety of their own that hands you an opening. Conversely, a safety that leaves an easy kick invites your opponent to settle back into an aggressive rhythm immediately.
This is also where mental pressure compounds. Opponents who know you play a disciplined safety game tend to take fewer risks against you, often opting for their own safety rather than attempting a low-percentage shot-making escape. Our piece on defensive strategy and planning shots ahead covers similar momentum principles that apply just as directly to 9 ball, where the gap between an escape and a forced miss often decides the entire match.
When to play it safe and when to press
The clearest lesson from league play is that reproducible safeties beat flashy low-percentage shots almost every time. A distance safety you can execute nine times out of ten is worth more than a thin cut you make half the time, even if the thin cut looks more impressive.
I tell players in our tournaments to commit fully once they decide on a safety. Half-hearted safeties, where you still hope to accidentally pocket something, tend to leave the worst possible layout. Treat the safety like the shot you are actually trying to make, and practice that commitment until it feels automatic.
— Q
Book a table or coaching session to put these safeties into practice
Reading about safety play only gets you so far. The fastest way to make distance, angle, and snooker safeties second nature is repetition on a real table, and that's exactly what our tables and tournaments at Q Billiards Arena are set up for.
Our American Pool and other table options are available for walk-in practice sessions where you can run the drills in this guide at your own pace. If you want to test your safety game under real pressure, our Tuesday and Friday night pool tournaments put you across the table from players who will punish a sloppy leave. For more structured development, our Snooker Coaching Camp covers the same speed-control fundamentals that make these pool safeties reliable. Walk-in tables are typically available, so you can start practicing today.
FAQ
What are the basic rules of 9-ball?
Players must contact the lowest-numbered ball on the table first on every shot, and the rack is won by legally pocketing the 9-ball at any point during a legal sequence. The official 9-ball rules outline additional details on fouls, racking, and ball-in-hand that shape how a rack is actually played out.
Can you call a safety in 9-ball?
Yes, under call-shot formats a shooter may declare "safety" before taking a shot, and play passes to the opponent once that shot is finished. Any object ball pocketed during a called safety is typically spotted rather than scored, which keeps the layout intact for the next shooter.
How to win 9-ball immediately?
There is no shortcut that guarantees an immediate win, since the 9-ball must be legally pocketed as part of a valid sequence rather than sunk out of turn. Building a reliable safety game, using the distance, angle, and snooker hierarchy, is one of the most dependable ways to control a rack until a run-out opportunity appears.
Is there slop in 9-ball?
Many standard 9-ball formats do not require players to call every shot, which means a ball pocketed on an unintended shot can still count as long as the lowest-numbered ball was contacted first. Formats that do require calling shots, as noted in official rule summaries, remove this slop element and require every pocketed ball to be called.
Sources
These sources back the rules and strategy guidance covered above, including the WPA rules, VNEA 9-ball rules, BCA rules summary, AimGeometry safety lesson, and Dr. Dave's safety examples. Links are included for verification and further reading.
- WPA rules (2025.09.15)
- VNEA 9-Ball rules (2022)
- Official rules of 9-ball — BCA summary (CueSight)
- AimGeometry: 9-ball safety lesson
- Dr. Dave — VENT safety examples (Billiards Digest excerpt)